Setup Phones/Tablets/PCs:
By default Ruby controller outputs the live video stream from the vehicle to it's HDMI output port.
You can use smartphones,tablets or a PC as a secondary display for the live video stream and for telemetry.
There are two options to connect external devices to Ruby controller:
USB Tethering
This option should be used to connect to a phone or tablet.
The setup is as follows:
- Using a regular USB cable, connect your phone/tablet to a USB port on the Ruby controller;
- On your phone/tablet install a FPV VR app (any) from Google Play Store. Like this one: FPV VR On Google Play Store;
- Then, on the controller menu, just enable forwarding the video stream to the USB tethering connection so that the phone becomes a secondary display:
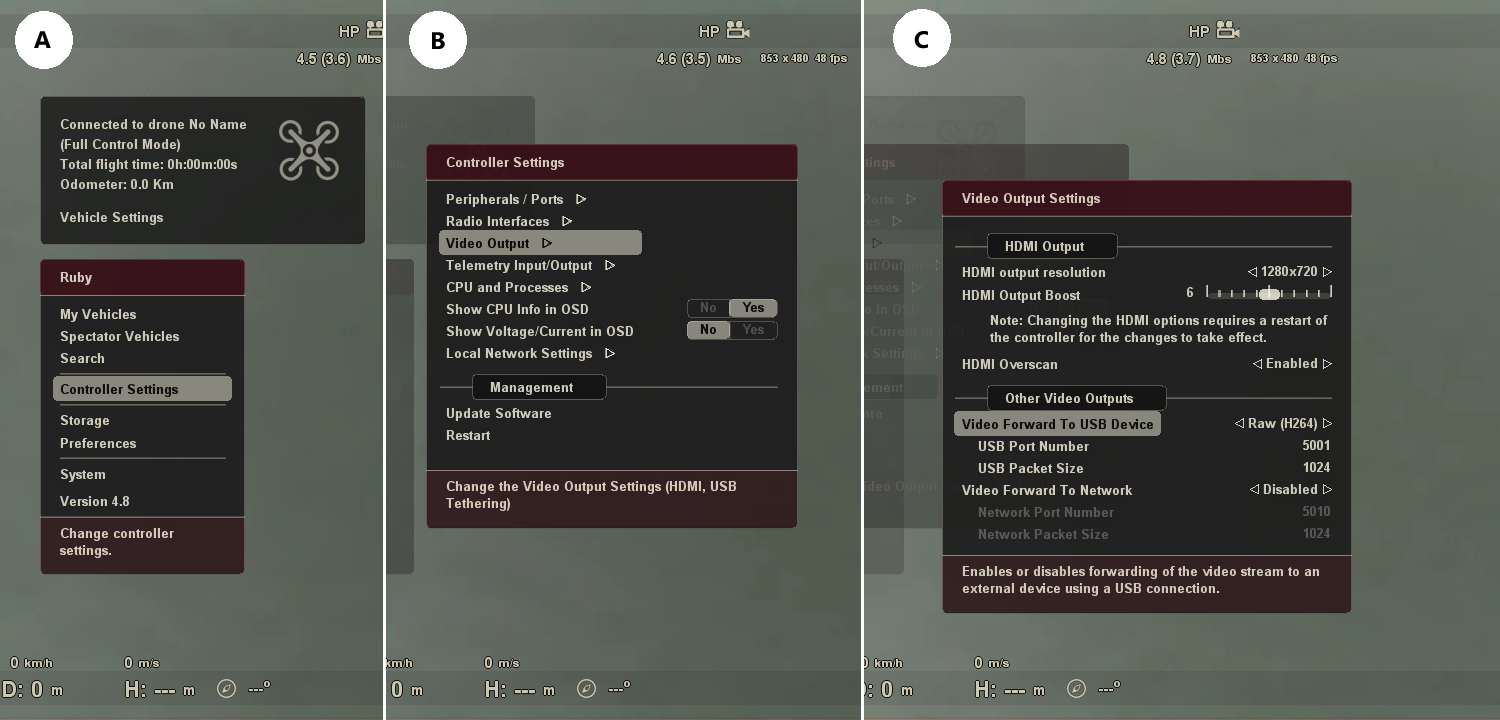
How to enable USB tethering and video output to phone
Most FPV/VR apps on the phones do support displaying also the telemetry information, not just video. To get also telemetry on the phone apps, make sure you enable the telemetry output too on the controller:
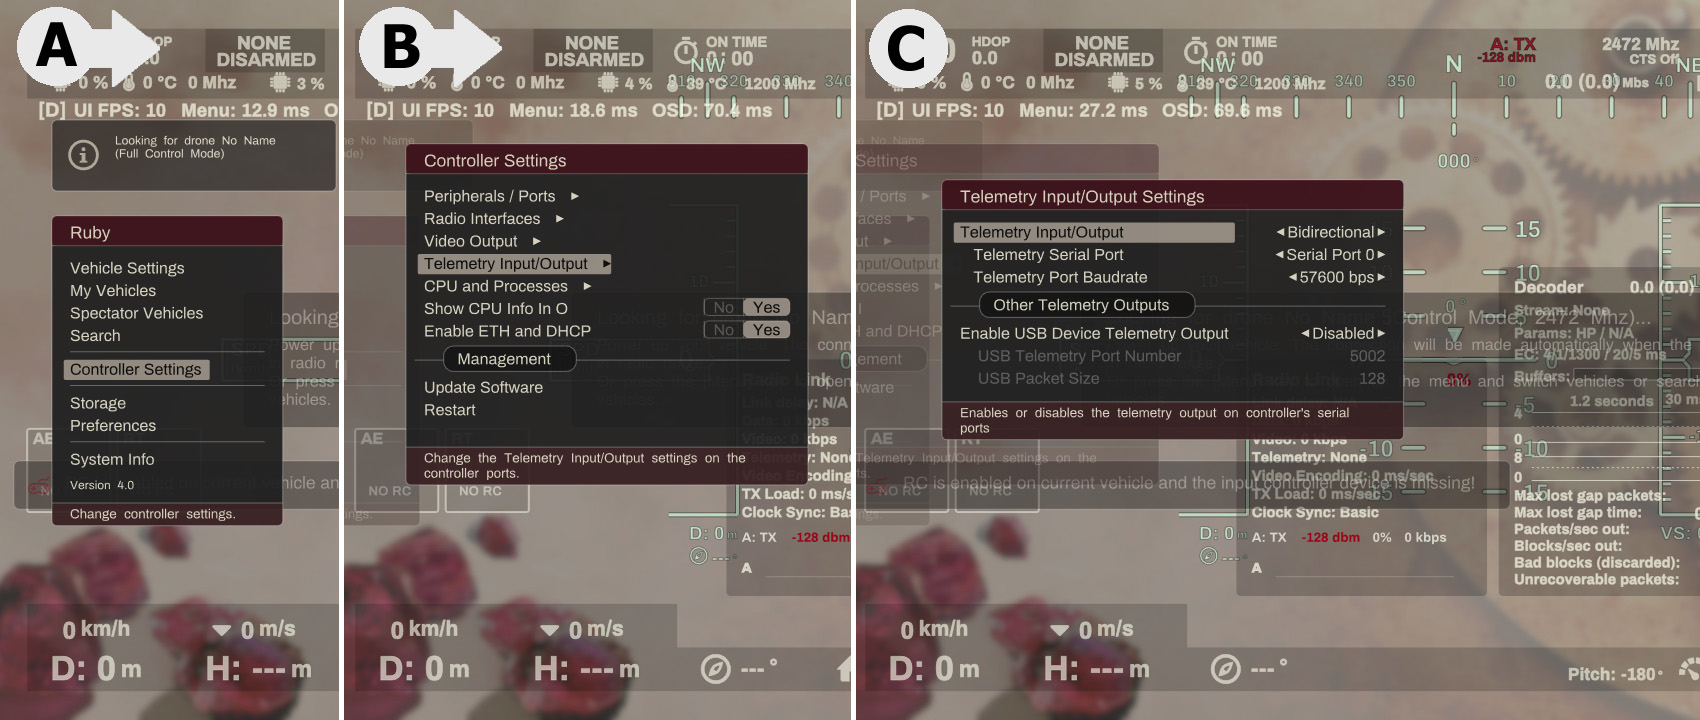
How to enable telemetry output on the USB tethering connection
Here is an example on how to start video on your phone:
- In Android app FPV VR: settings -> video settings -> raw 264 and port 5001;
- In android app FPV VR : settings -> set protocol to mavlink (if using mavlink oviously) and set the port 5002;
- In ruby controller settings: enable usb telemetry port 5002 (default);
- In ruby controller settings : enable video output usb and set port 5001(default);
- Phone/tablet in thetering mode (settings -> wireless&networks -> more -> usb Tethering);
- Launch phone app FPV VR (with all settings as in point 1);
- Click on Connect (V/T settings) and there is a menu in the top left corner (opposite to settings menu) -> set to EZ-Wifibroadcast/OpenHD and go back;
- Click on start video
PC connection using the local network
This option should be used to connect to a PC.
The setup is as follows:
- Connect your Ruby controller to the same network as your PC using your router and an ethernet cable. You can also use a direct ethernet cable between Ruby controller and the PC, in which case you need to enable the Static IP option in the controller from
Menu->Controller->Network - On your PC install GStreamer and Mission Planner or QGroundControll;
- Then, on the controller menu, just enable video forwarding to the local network so that you can consume the video stream on your PC:
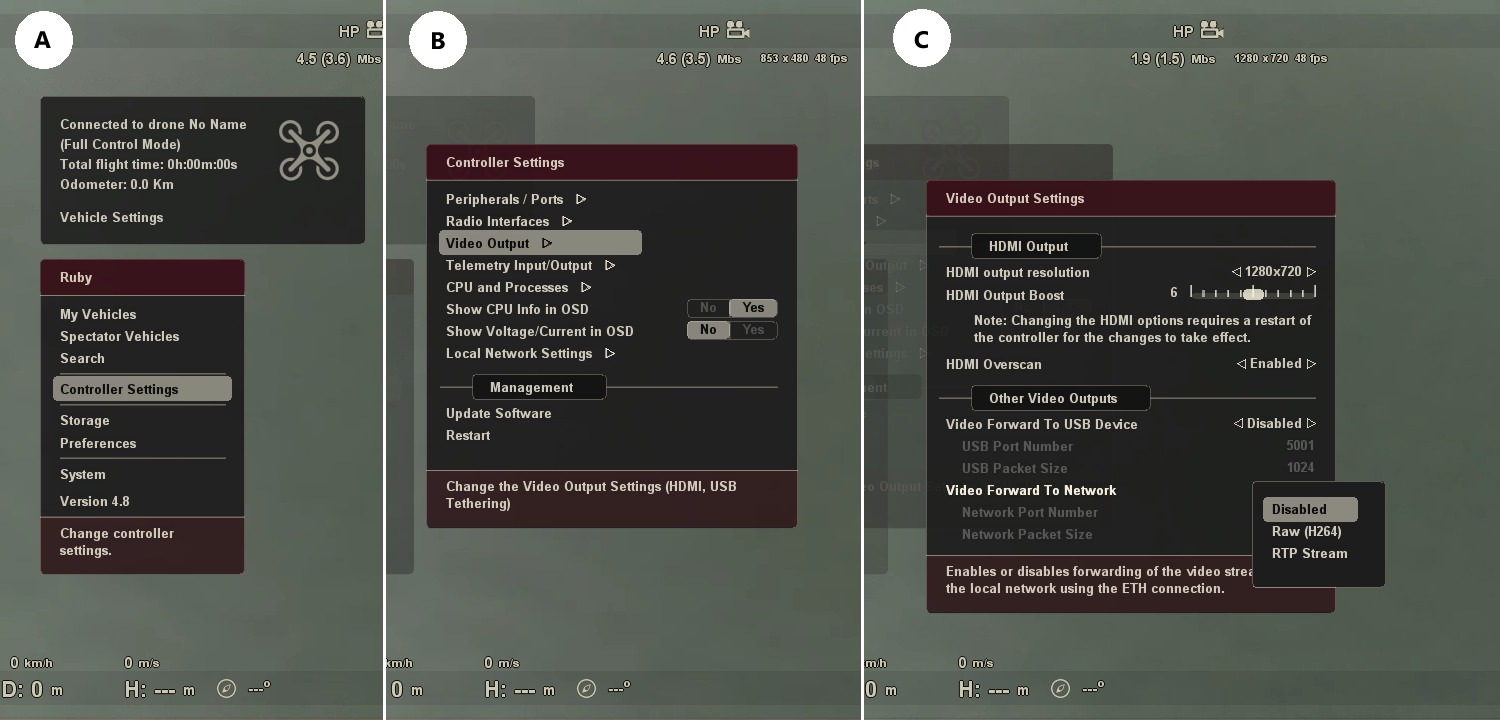
How to enable video forward to local network
Now the video stream is available to be consumed on a PC. To display the video stream on the PC, first export it as Raw (H264) from the menu above and use GStreamer on the PC to read the video stream and convert it to a format that Mission Planner understand.
To do that, install GStreamer on your PC and then from a command prompt launch this command:
gst-launch-1.0.exe udpsrc port=5010 ! h264parse ! rtph264pay ! udpsink host=127.0.0.1 port=5600
Replace port 5010 in the command above with the port number you configured in the controller menu above, if you changed the default 5010;
Basically this will transform the video stream to a format Mission Planner understands and will be available for consumption by Mission Planner on port 5600.
In Mission planner, right Click on the HUD and then choose the "Set GStreamer Source" option:
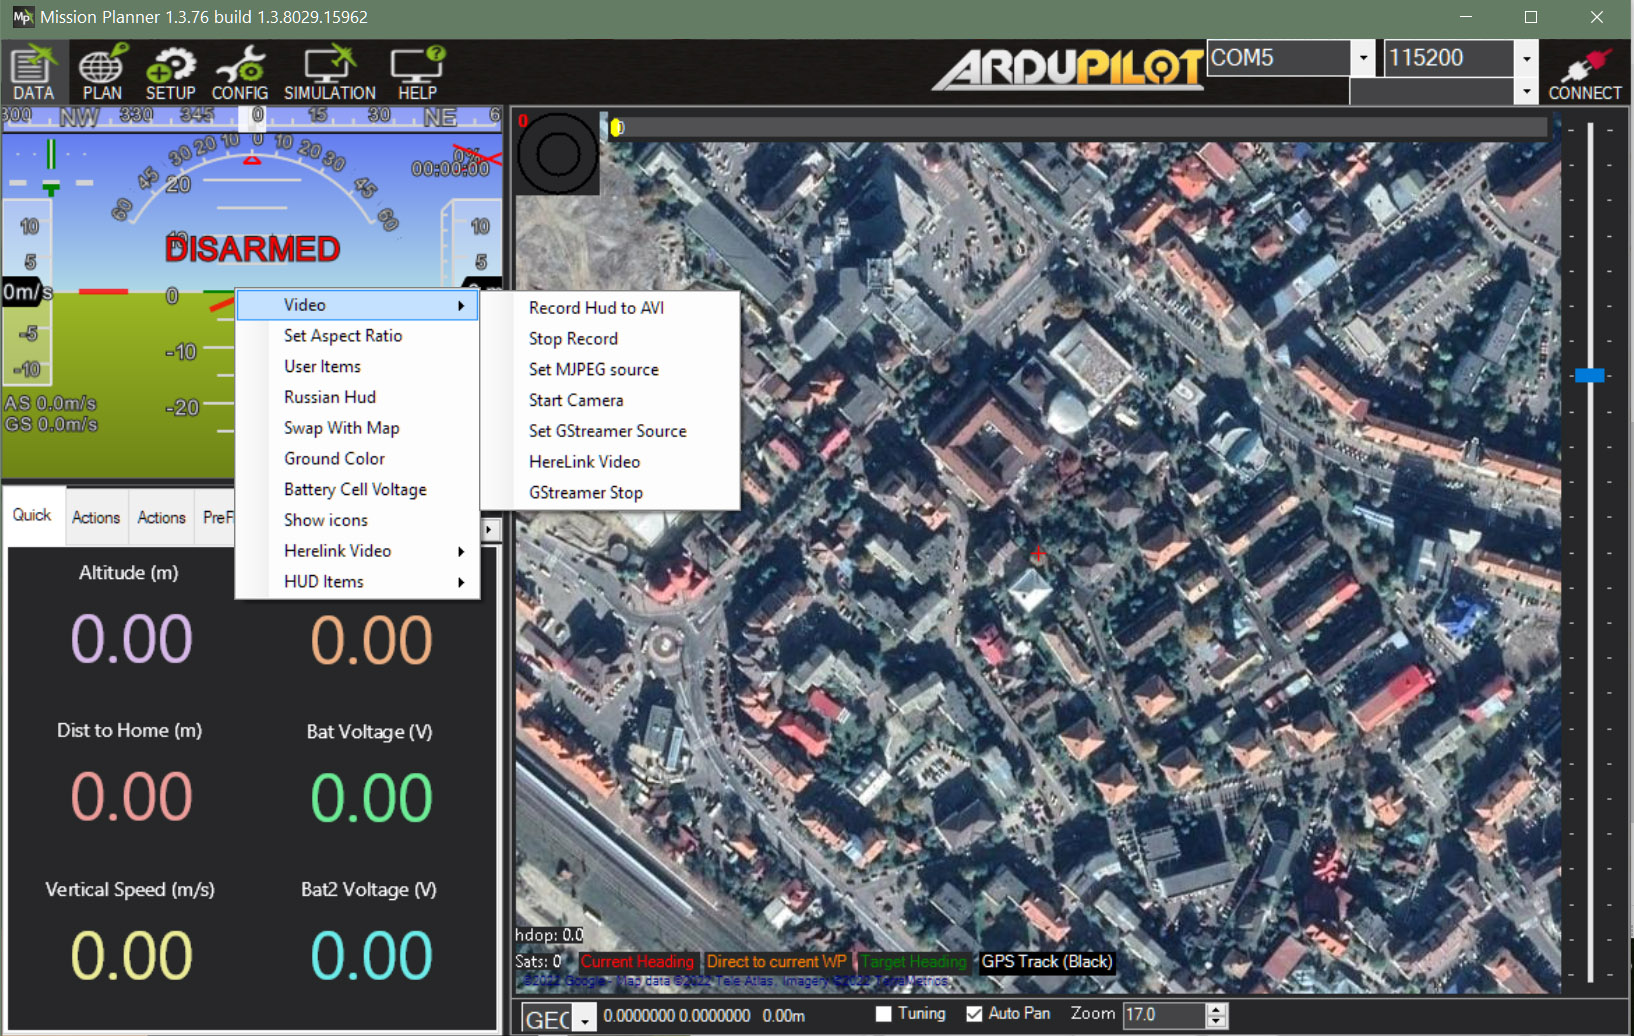
How to display video stream on Mission Planner
In the popup windows that shows up, enter this params:
rtspsrc location=rtsp://127.0.0.1:5600 ! videoconvert ! video/x-raw,format=BGRA ! appsink name=outsink
You might need to replace the 127.0.0.1 IP with your PC IP if it does not work.
That's all, you should have now video stream showing up in the Mission Planner HUD display.